Tracking Traffic Without Spying: Setting up GoatCounter Analytics
Want to track your blog's traffic without invasive spying or annoying cookie banners? Learn how to set up GoatCounter—a lightweight, privacy-focused alternative to Google Analytics—in under 10 minutes.
Background
Recently, I set up my blog with a humble wish: I simply wanted to know if people were reading it. (By the way, if you are reading this—thank you! 🫶)
I knew Google Analytics could get the job done, but it felt like overkill. Specifically:
- It can be heavy: The script is comparatively larger and can potentially slow down the site.
- It can be invasive: It involves tracking personal data, which often requires those annoying “Cookie Consent” banners to comply with GDPR.
So I did my research, and I was more than happy to stumble across GoatCounter—a privacy-focused, open-source analytics utility.
Why GoatCounter?
- Privacy: It doesn’t track individual users or IP addresses, so I generally don’t need a “Cookie Consent” banner.
- Simplicity: The dashboard is clean—just pageviews and referrers.
- Performance: The actual downloaded library is tiny (~3kb) compared to Google’s (~45kb+).
How to Set It Up
1. Prerequisite
Go to goatcounter.com/signup to sign up.
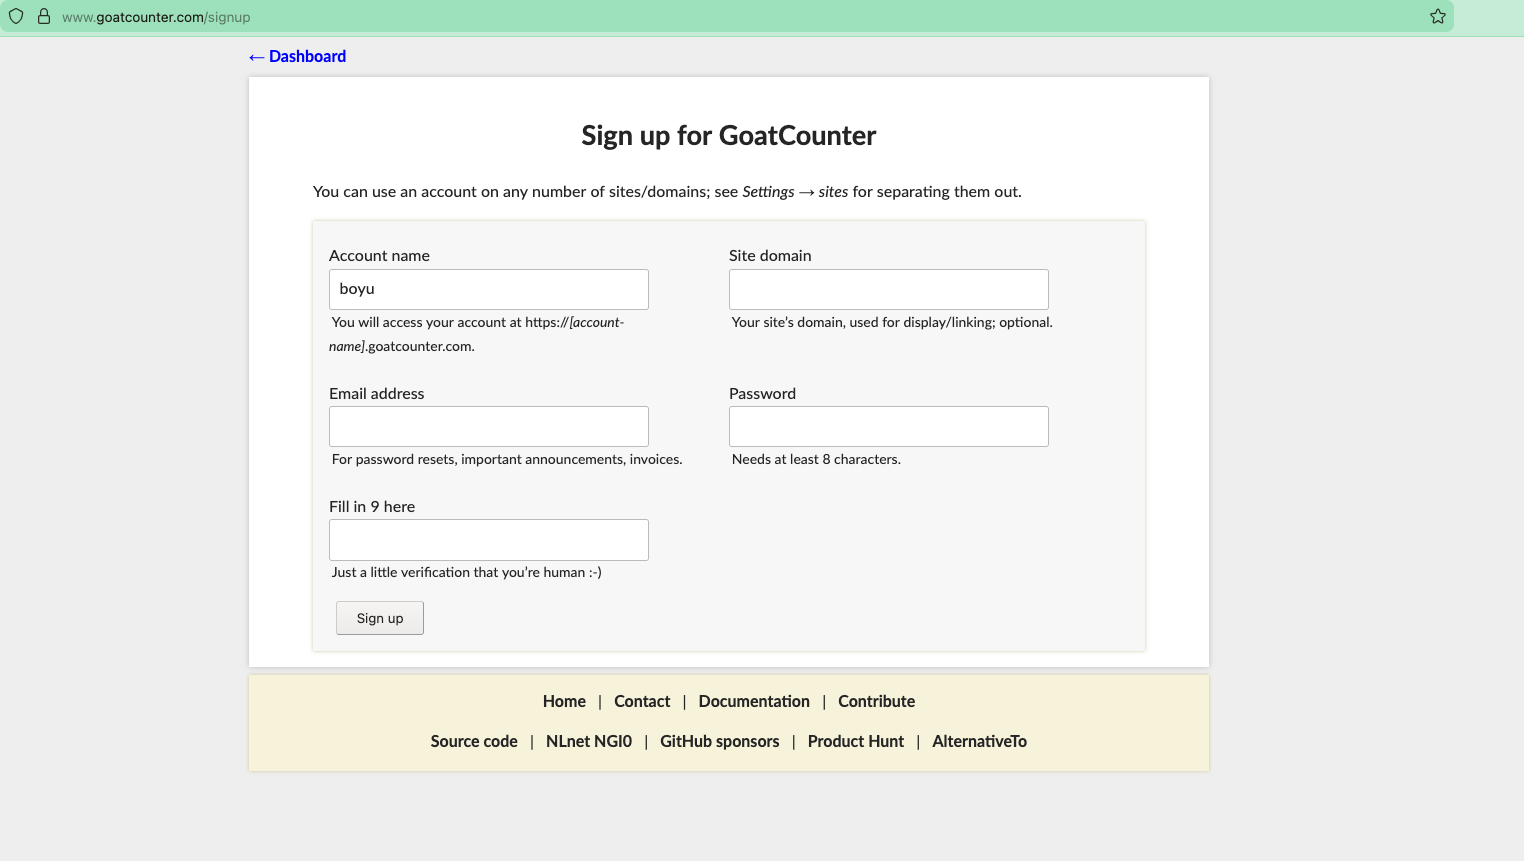
You’ll receive a verification link in your email. Just verify it, and you’re good to go.
2. Inject the Script into Your Blog
After signing up, you’ll be redirected to your dashboard at
https://boyu.goatcounter.com(replaceboyuwith your actual code). If not, you can manually navigate there. Once there, copy the provided script.
(READ THIS CAREFULLY) Paste that script into
_includes/head-custom.html(create the file if it doesn’t exist yet). Your_includes/head-custom.htmlfile should look like this: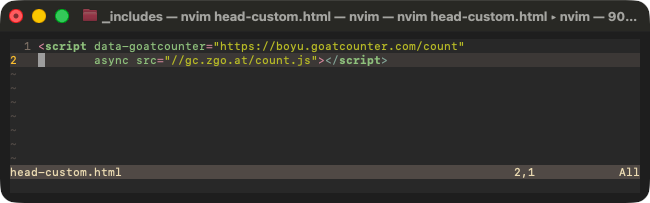
3. Verification
Since I am a developer, my first instinct was to open the browser console to verify that the browser was actually talking to GoatCounter. As you can see, when I load one of my posts, it works!

Ok, here comes the real deal—the smoking gun evidence. I navigated to my dashboard. After a successful login, I saw the sweet insights page with a record that strongly proves the analytics is working.

How Do I Monitor Traffic?
Just navigate to https://boyu.goatcounter.com (replace boyu with your code), login, and VOILÀ.
Conclusion
- It literally took me less than 10 minutes to make it work. This felt great, but what makes it even better? Knowing that readers like you can feel at ease regarding privacy. This is a tasteful choice, and I like it. ;)
- Feel free to check out the source code if it helps!